How to Move Your Home Gym: Equipment Moving Guide
Aug 26, 2025

Moving house is never a walk in the park. Add in your home gym, and suddenly you’re facing a marathon. Treadmills, weight machines, dumbbells, yoga mats, it’s all an investment in your health, but also heavy, awkward, and occasionally fragile. One wrong move and you could be looking at a scratched floor, a broken console, or worse, a back injury.
The good news? With the right game plan, you can move your gym equipment safely and efficiently, without losing your mind (or your gains). Whether you’re moving across town or cross-country, here’s the ultimate guide on how to move home gym equipment.
How to Move Home Gym Equipment

Step 1: Take Inventory and Plan Ahead
Before lifting anything, take a strategic approach. Think of it like designing your workout routine. You don’t just wing it, you plan.
- Create a detailed equipment list. Write down each item, its approximate size, and weight. This helps you visualize what you’re working with.
- Decide what to keep, sell, or donate. Be honest: if you haven’t used that rowing machine in two years, do you really want to haul it to a new house? Sell it online, donate it to a local community center, or gift it to a friend. Less clutter, less hassle.
- Mark items that may require professional help. Treadmills can weigh up to 500 lbs, and multi-station gyms even more. Unless you moonlight as a powerlifter, some items may need movers.
- Measure twice, move once. Compare the size of your equipment with doorways, stairwells, and elevators in both your old and new homes. You don’t want to discover mid-move that your elliptical won’t fit through the basement door.
Pro Tip: Sketch out your moving path like a football play. Note tight corners, stairs, or obstacles so you’re not improvising with 300 lbs of steel in your hands.
Step 2: Clean and Sanitize Your Equipment
This isn’t just about hygiene (though nobody wants to unpack a yoga mat that smells like a locker room). Clean equipment also prevents bacteria, rust, and mildew from hitching a ride.
- Sanitize everything. Use disinfectant wipes on handles, consoles, and benches.
- Wash fabrics. Resistance bands, yoga towels, wraps—give them a proper wash and let them dry completely.
- Be mindful of electronics. Use electronic-safe cleaners on treadmill screens and consoles. No soaking. Moisture can fry delicate circuits.
- Rust prevention. Wipe down metal weights with a dry cloth after cleaning. For rubber-coated gear, stick to mild cleaners that won’t degrade the material.
Pro Tip: A vinegar + water + tea tree oil mix makes a budget-friendly and effective cleaner for mats and accessories. You can also make use of this preventive maintenance checklist.
Step 3: Disassemble Large Equipment
Machines are like puzzles, easier to move in pieces than as one bulky unit.
- Locate manuals. Most manufacturers offer downloadable versions if you’ve lost yours.
- Document before disassembly. Take photos or videos of wiring, pulleys, and weight stacks. Future-you will thank you when reassembling.
- Work methodically. For treadmills: unplug, remove safety keys, fold down the deck. For ellipticals: remove consoles and handlebars first.
- Label and bag small parts. Screws, bolts, clips, store in zip-lock bags labeled “Bench – Backrest Bolts”. Tape them to the main frame or keep them in a master hardware box.
- Wrap as you go. Bubble wrap, moving blankets, and towels help prevent scratches or dings.
Pro Tip: Secure cables with zip ties so they don’t tangle like headphone cords from 2005.
Step 4: Pack Smart (and Heavy)

Packing gym gear isn’t like packing clothes; it’s heavy, awkward, and often sharp-edged.
- Protect fragile components. Screens, monitors, and chrome parts need padding.
- Box smart. Use multiple small, sturdy boxes for weights. Don’t overload one giant box. Your mover (or spine) won’t forgive you.
- Prevent shifting. Stuff towels or packing paper between weights to keep them from clanking around.
- Label boxes clearly. Write contents, room, and “HEAVY” where necessary. Color-coding helps speed up unloading.
- Pack an essentials box. Toss in resistance bands, mats, or a kettlebell so you can work out before the rest of your gym is rebuilt.
Step 5: Moving Day – Tools and Techniques
This is where safety is king. Don’t treat it like a workout; treat it like a project.
- Get the right gear. Furniture dollies, hand trucks, moving straps, and sliders — all can be rented affordably and will save you hours.
- Lift properly. Bend at the knees, keep your back straight, and lift with your legs. Always have a buddy for big items.
- Protect your home. Cover floors with cardboard or plywood, pad corners with towels, and remove doors if needed.
- Clear the path. Kids, pets, and rugs — make sure nothing’s in your way when moving heavy gear.
Pro Tip: Think about loading order. Put heavier, stable items like weight racks at the bottom of the truck, then lighter, delicate pieces on top.
Step 6: Consider Professional Help
Some moves are a DIY win. Others? Better outsourced.
Hire home gym movers if you’re:
- Moving long distances
- Navigating multiple flights of stairs
- Handling huge, commercial-grade machines
- Worried about damaging pricey equipment
What pros bring to the table:
- Industrial dollies, straps, and reinforced trucks
- Experience with tricky moves (tight hallways, basements)
- Insurance to protect your equipment if something goes wrong
- Yes, it costs extra, but replacing a damaged treadmill motor could be far pricier.
Step 7: Reassemble and Set Up in Your New Space
Now for the fun part, setting up your fitness zone again.
- Plan the layout first. Leave 2–3 feet of space around machines for airflow and safety. Think about workout “zones”: cardio corner, free weights, stretching area.
- Reverse your notes. Use your photos and manuals to rebuild. Start with the larger, stable components, then add smaller ones.
- Check all connections. Tighten bolts, re-route cables, and double-check safety features like treadmill keys or emergency stops.
- Test gently. Start at the lowest treadmill speed, try a light resistance setting, or test machines with minimal weight before going full strength.
- Mind your flooring. Use mats under weights and heavy machines. This protects floors and reduces noise.
Pro Tip: Schedule a “maintenance check” after a week; sometimes bolts loosen slightly after a move.
Common Mistakes to Avoid While Moving Home Gym Equipment

Even with the best intentions, there are a few classic mistakes people make when relocating fitness equipment. Avoiding these can save you money, time, and even a trip to the chiropractor.
1. Overloading Boxes with Weights
It’s tempting to pack all your dumbbells or weight plates into one giant box. The problem? That box will either burst open or be impossible to lift. Even movers dread “mystery heavy boxes.”
Why it’s a problem: Cardboard boxes have a weight limit. Too much strain can cause them to tear mid-lift, damaging both your gear and your flooring.
The fix: Distribute weights across multiple small, sturdy boxes or plastic bins. Wrap each dumbbell or plate in a towel or bubble wrap to prevent scratches and rattling.
2. Skipping Measurements
One of the most frustrating moving-day moments is realizing your treadmill or squat rack won’t fit through the door.
Why it’s a problem: Tight corners, narrow stairwells, or low ceilings can stop a move in its tracks. Forcing equipment through small spaces risks damage to both your gear and your walls.
The fix: Measure everything — equipment dimensions, doorway widths, hallway clearance. Compare old and new spaces before the move. If it doesn’t fit as-is, plan for disassembly.
3. Cleaning Equipment the Wrong Way
A quick wipe might feel enough, but using the wrong cleaners can ruin sensitive electronics or leave residue.
Why it’s a problem: Spraying treadmill screens or elliptical consoles with liquid can short-circuit them. Using harsh cleaners on rubber coatings can cause them to crack.
The fix: Use electronic-safe wipes for consoles and a gentle vinegar-water solution for mats. Always dry thoroughly to avoid rust and mildew.
4. Tossing Hardware into Random Boxes
Bolts, screws, washers, and safety pins often “go missing” during a move. Without them, your equipment can’t be reassembled correctly or safely.
Why it’s a problem: Missing or mismatched hardware means wobbly benches, unsafe weight stacks, or machines that don’t function at all.
The fix: Keep a “hardware box” or use labeled zip-lock bags taped to the corresponding equipment piece. Take photos of how the parts were connected before disassembly.
5. Treating the Move Like a Workout
It’s easy to slip into “beast mode” when moving gym gear, but rushing or lifting solo is how injuries happen.
Why it’s a problem: Heavy, awkward loads can strain your back, knees, or shoulders. Plus, trying to move a treadmill without help risks dropping it (and destroying the floor).
The fix: Use proper moving tools (dollies, straps, sliders) and recruit a moving buddy. Treat moving day as project management, not a workout. Save the PR lifts for after setup.
6. Forgetting to Protect Floors and Walls
Dragging or sliding heavy gear directly on hardwood or tile might seem easier, but the scratches and dents left behind say otherwise.
Why it’s a problem: Repairing damaged flooring or patching wall dents can be costly and time-consuming.
The fix: Lay down cardboard, rugs, or moving blankets along your path. Use furniture sliders under machines with metal bases. Pad corners and doorframes with towels.
7. Rushing Reassembly
After a long moving day, you just want your gym back in action. But skipping steps or rushing setup can compromise safety.
Why it’s a problem: Loose bolts, misaligned cables, or incorrectly routed wires can make machines unsafe or damage them permanently.
The fix: Follow your manuals and the photos/videos you took during disassembly. Double-check all bolts and safety features before your first workout.
8. Ignoring Professional Help When It’s Needed
Sometimes DIY pride gets in the way, and people attempt to move 400-lb treadmills solo.
Why it’s a problem: This risks injury, damaged gear, or even structural damage to your home.
The fix: Know your limits. If a piece is too heavy, bulky, or awkward to move safely, hire professional moving companies. They have the gear, training, and insurance to handle it right.
Quick Reference: How to Move Different Home Gym Equipment
| Equipment | Average Weight | Disassembly Needed? | Special Handling Tips |
| Treadmill | 200–500 lbs | Yes (console & frame) | Fold the deck if possible; use a furniture dolly |
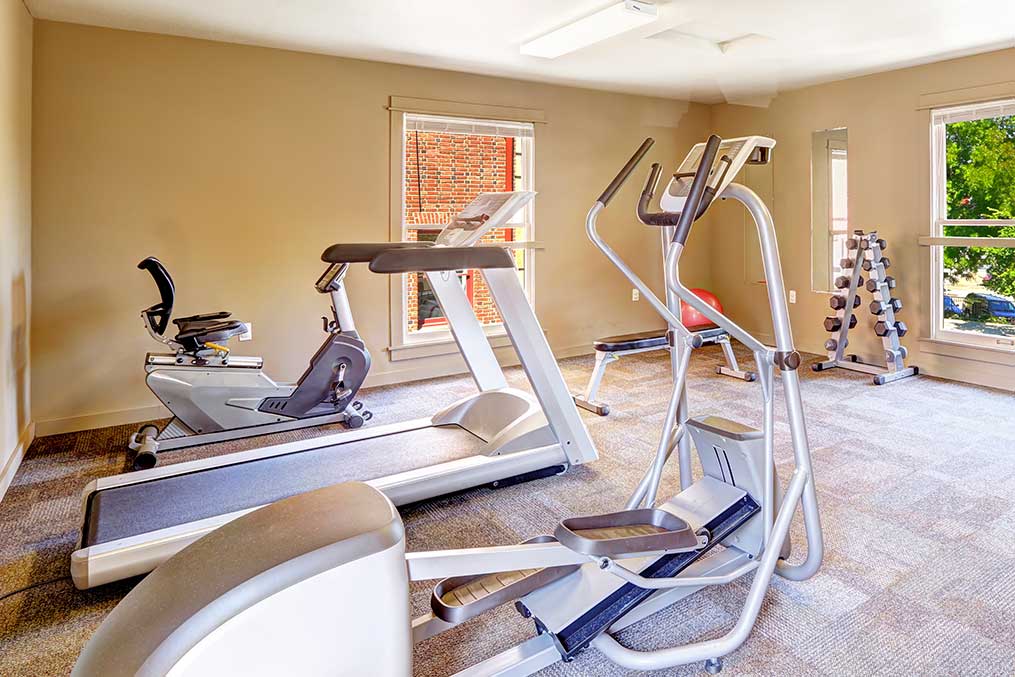
| Elliptical | 150–250 lbs | Yes (pedals, console, arms) | Remove pedals & arms; use moving straps |
| Stationary Bike | 50–150 lbs | Sometimes (pedals, handles) | Lift with a partner; secure the base |
| Weight Bench | 40–100 lbs | Rarely | Remove attachments; wrap with padding |
| Dumbbells / Weights | Varies (5–100 lbs each) | No | Pack in multiple small boxes; avoid overloading |
| Multi-Station Gym | 600–800+ lbs | Yes (multiple parts) | Hire professionals; extremely heavy and complex |
| Yoga Mats & Accessories | Light | No | Roll and secure with straps |
| Resistance Bands | Very Light | No | Store in sealed bags to prevent tangling |
Move Your Home Gym Equipment With Atlas Allied

Ready to make your move stress-free? At Atlas Allied, we know moving isn’t just about boxes and trucks; it’s also about protecting what matters most to you, from your favorite treadmill to your grandmother’s dining table. Our expert intrastate movers handle specialty items like home gyms with the same care as your everyday essentials, so you can focus on settling in while we do the heavy lifting.
Whether you’re relocating across California or across the globe, Atlas Allied is here to make your move smoother, safer, and easier. Get in touch today to get a free moving quote!